Advanced Settings
Warning
These settings are exclusive to the ByeByeDPI program! They should not be taken as byedpi arguments and inserted into other programs. Also, don’t share such settings with other people online, as their values strongly depend on the ByeByeDPI program settings.
Caution
These settings are intended for users who understand the tool. If you don’t understand what auto-selection, strategies, parameters, flags are, etc - don’t blindly click around. This page won’t help you.
SNI of fake packet
In the auto-selection settings, there’s a function to change the SNI for the fake packet. By default it’s set to google.com, but it can be changed to any other.
Changing it makes sense if you’ve carefully thought out the bypass method and are sure that your filter checks packets for SNI from the “Whitelist”.
Caution
Don’t change SNI to a host from the blocked list (for example, youtube.com or googlevideo.com) - this will only make the filter understand that you’re DEFINITELY trying to access something blocked.
Built-in strategies automatically pick up SNI from settings. If you want your strategy to support this feature - you should specify the {sni} parameter for the -n flag, like this:
-n {sni}Then pass the modified strategy to auto-selection.
Replacing proxy lists
In byedpi, there are filtering functions that accept various lists: -H and -j.
To pass domain/subnet lists to them, you need to insert them according to byedpi rules, like this:
-H:"domain1.com domain2.com domain3.com domain4.com domain5.com ..."With a large list of domains, this option can be inconvenient. ByeByeDPI (from version 1.7.3) adds a custom parameter {list}.
Tip
This parameter works for both auto-selection and command line. If you apply such a strategy - it will be converted to one that byedpi can read before sending.
To use it, you need to specify the ID (name, for example Cloudflare from built-in) of the domain/subnet list from auto-selection settings. You can create your own list and specify its name. It should look like this:
-H:"{list:Cloudflare}"or
-j:"{list:subnets}"The second will work ONLY if you have a subnet list named subnets in the domain settings section.
Using ByeByeDPI with AdGuard
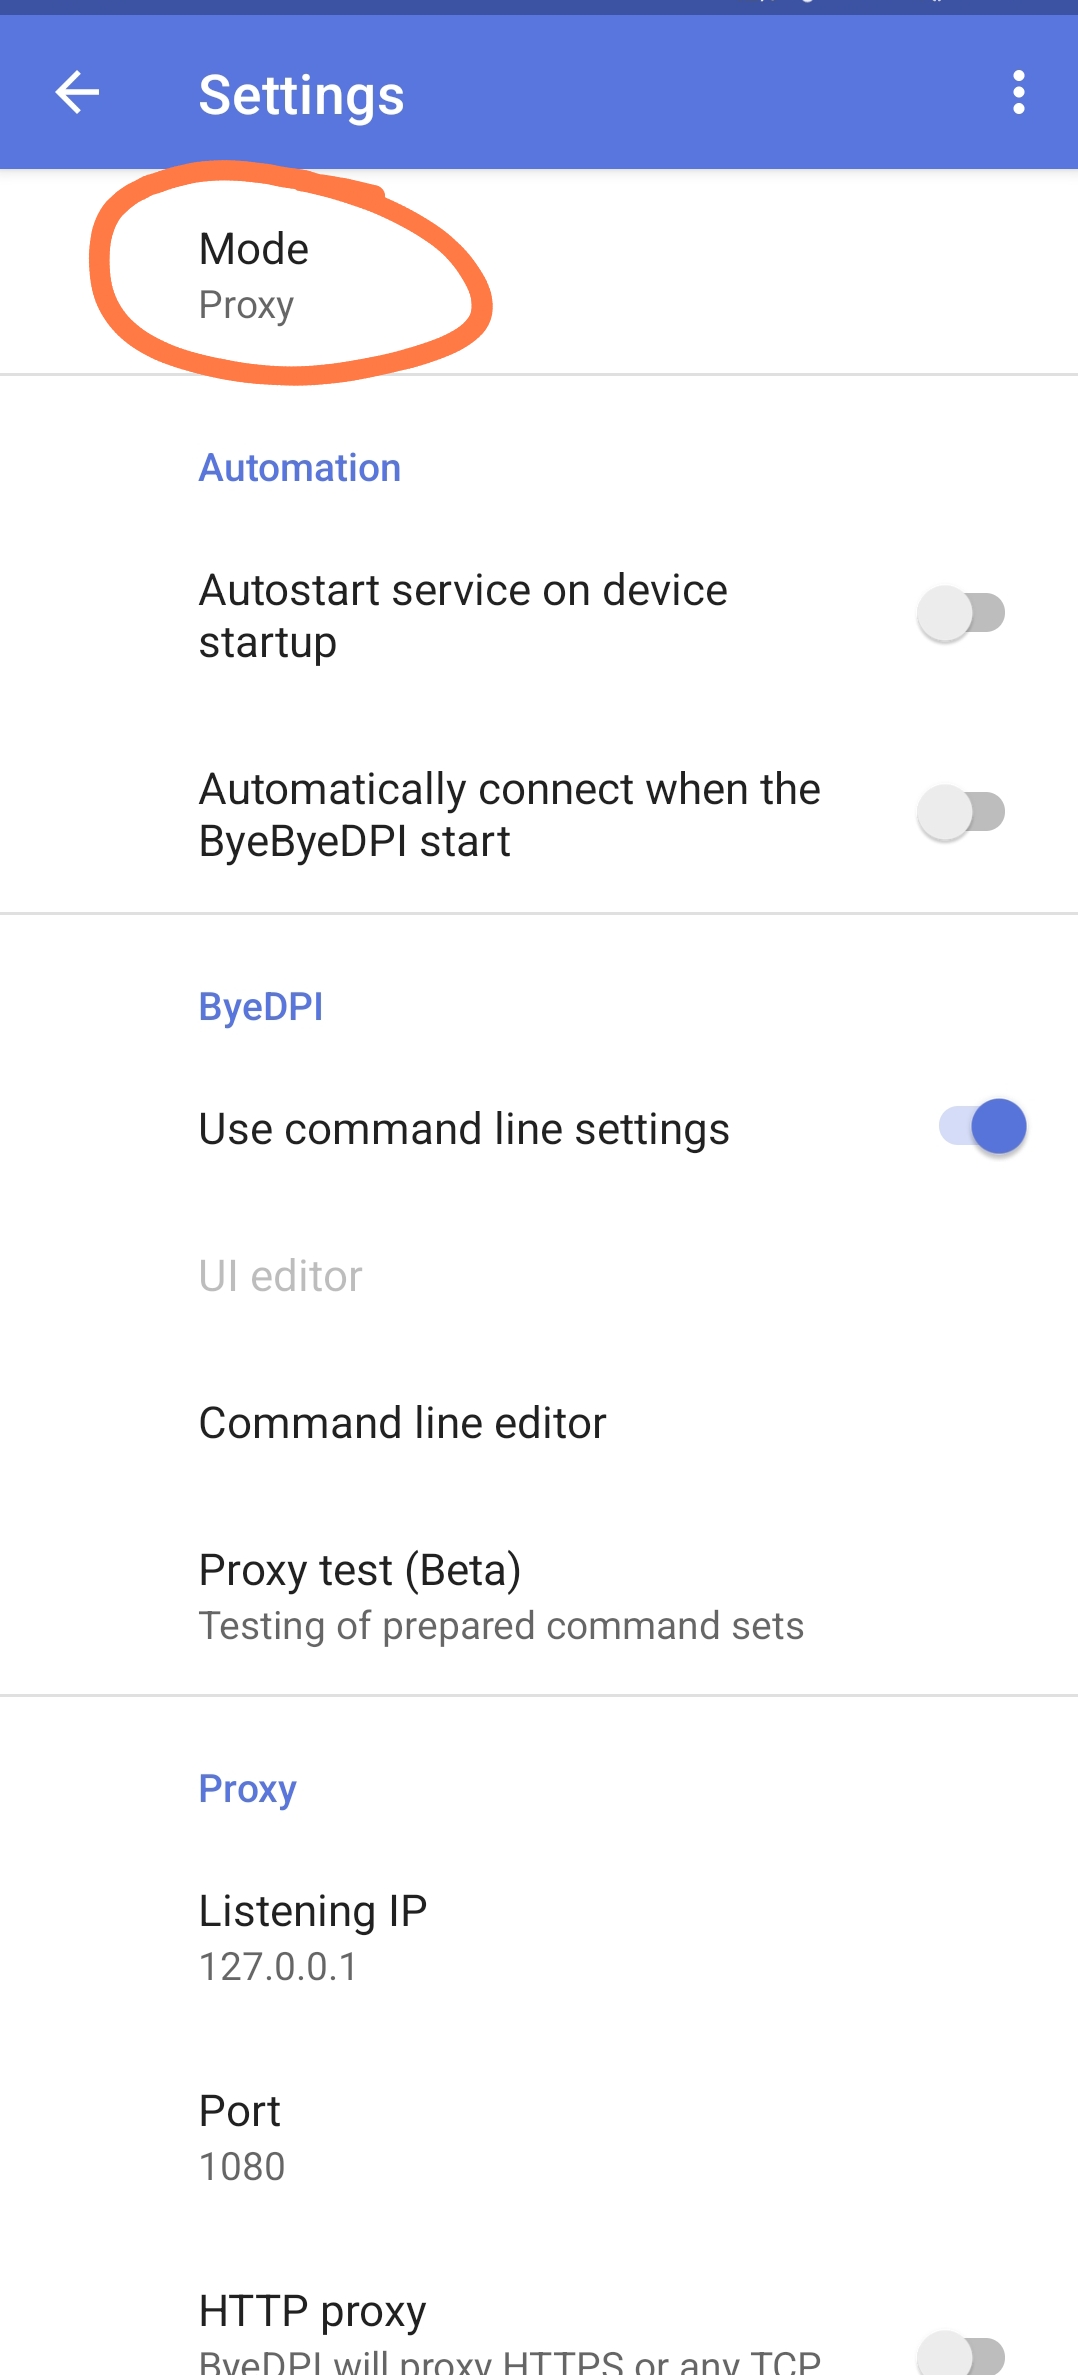
Switch ByeByeDPI to Proxy mode.
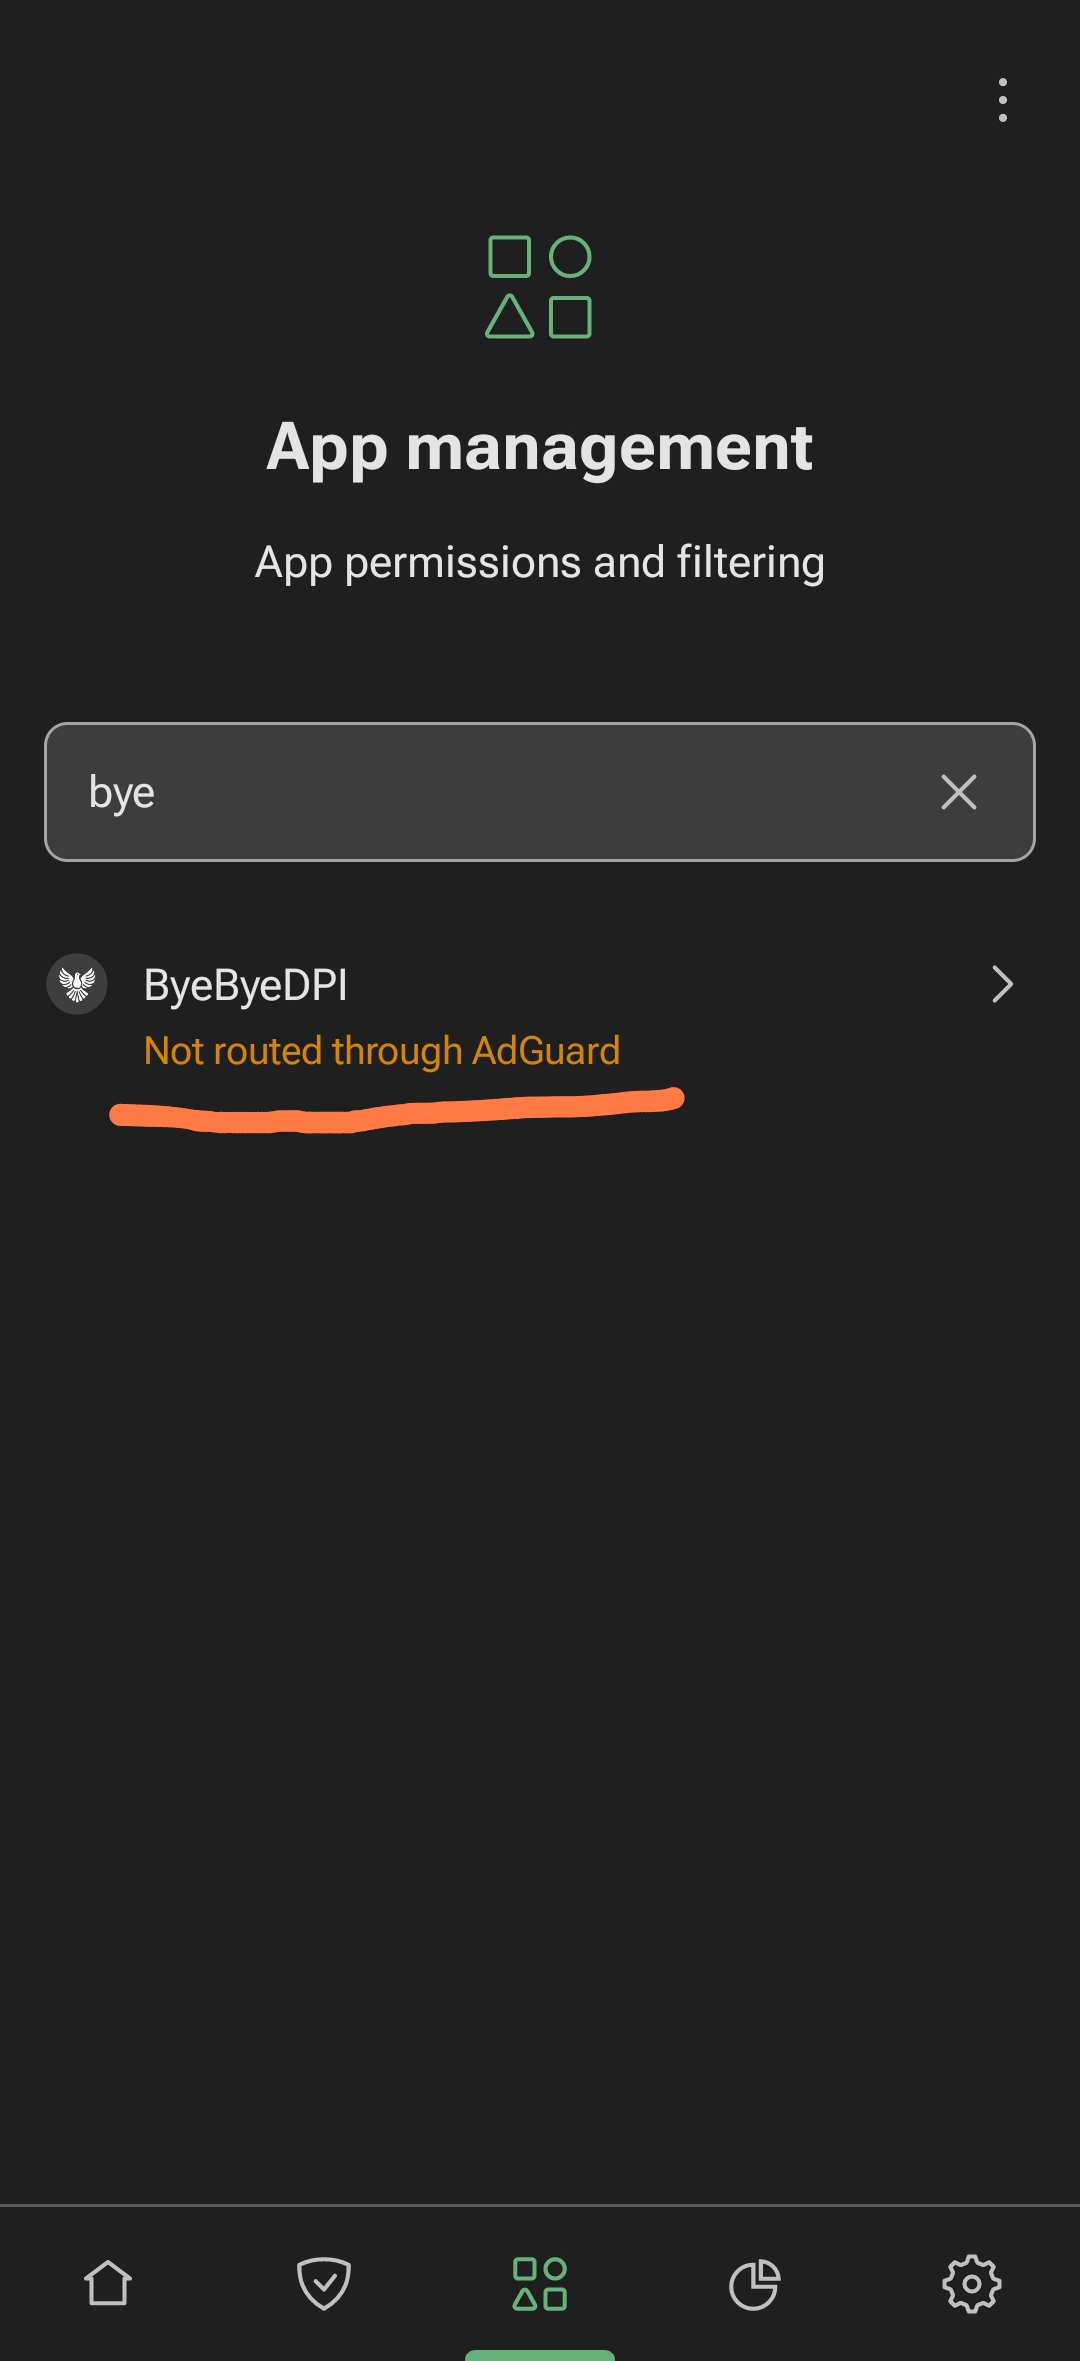
Add ByeByeDPI to AdGuard’s exceptions under Manage Applications: open the central AdGuard tab, find ByeByeDPI, and disable filtering for it.
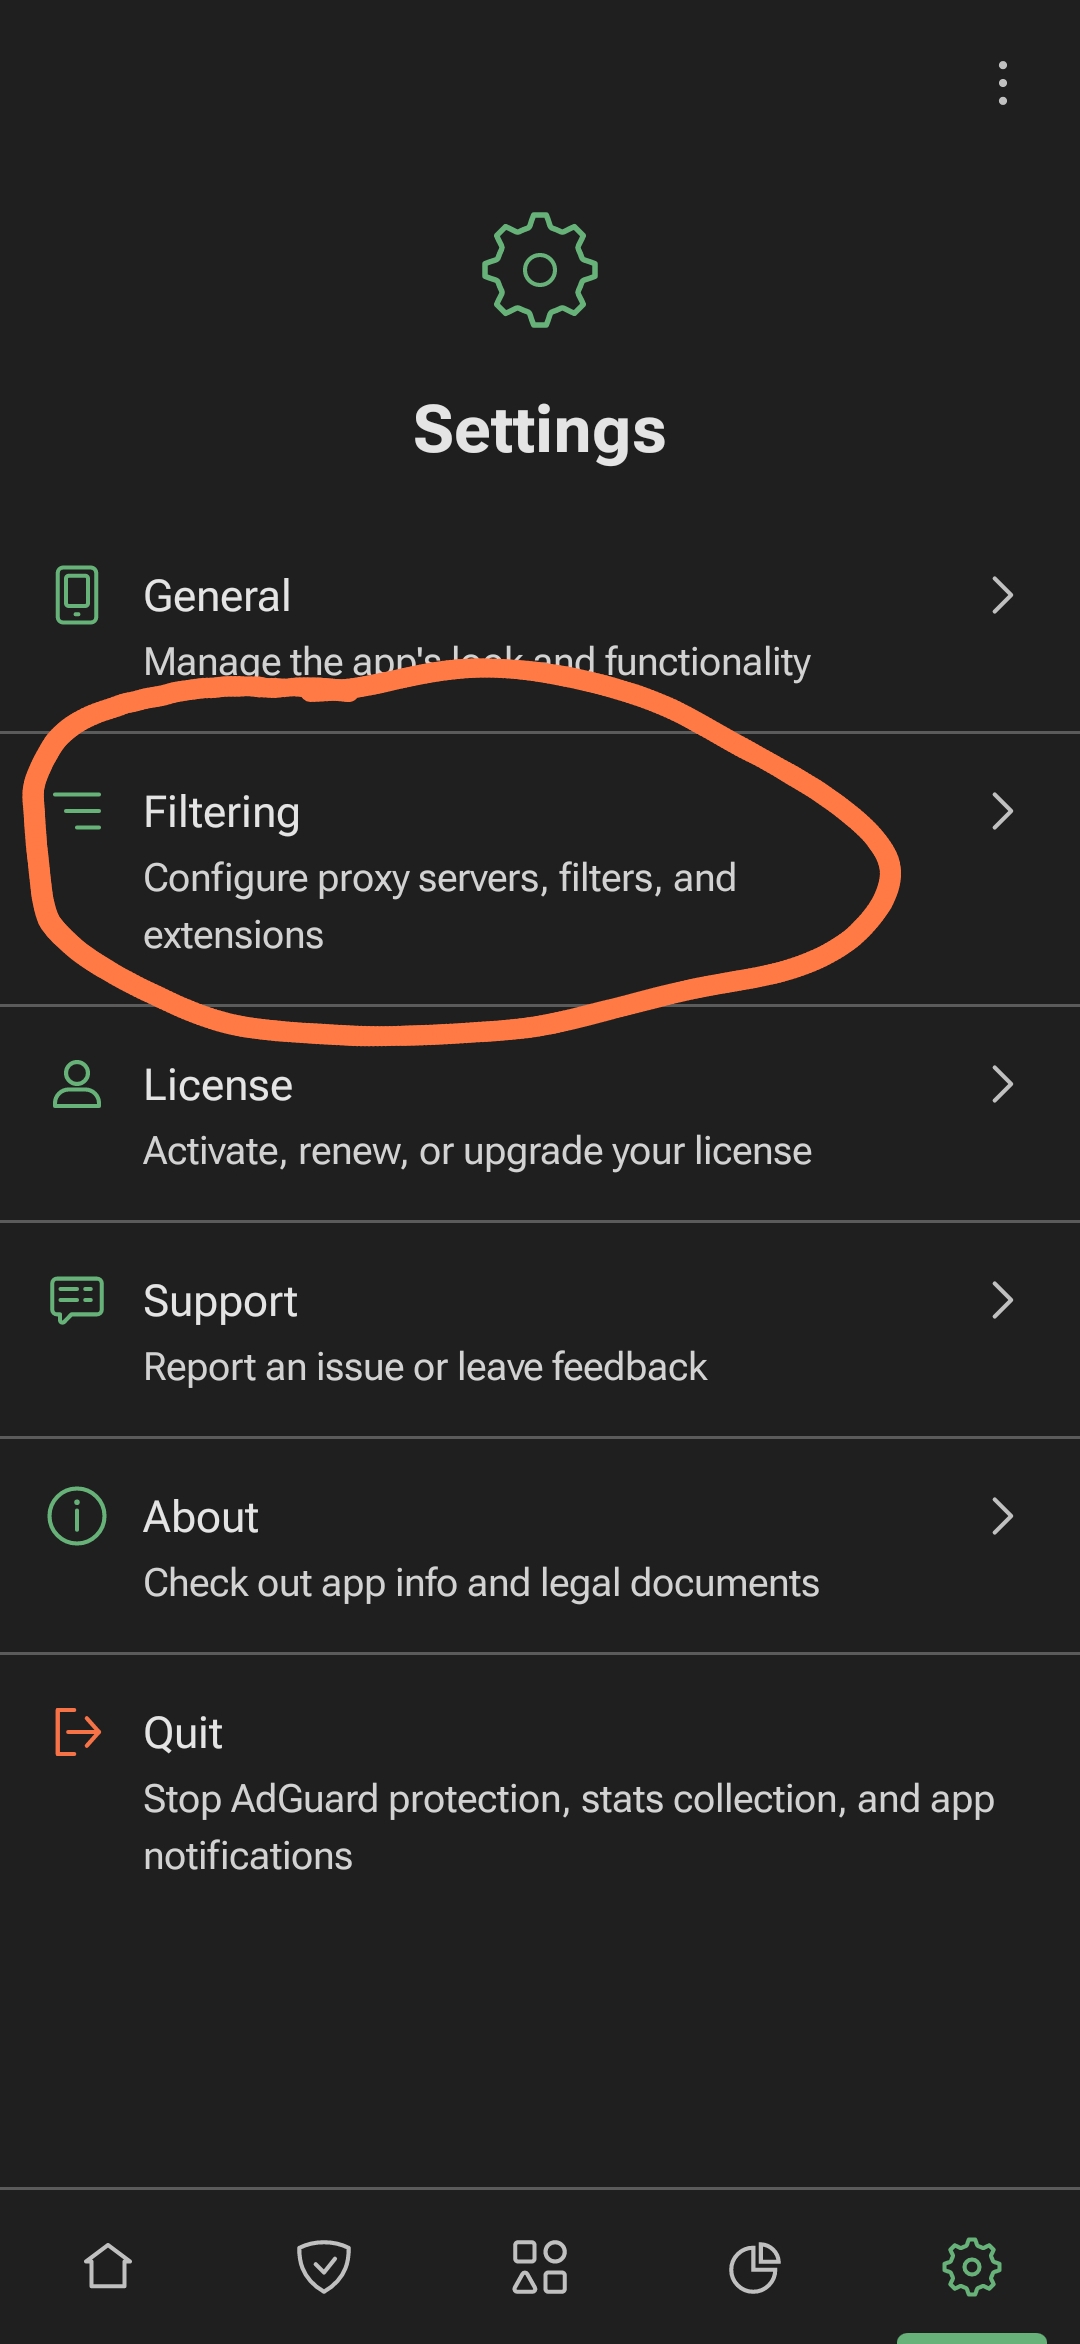
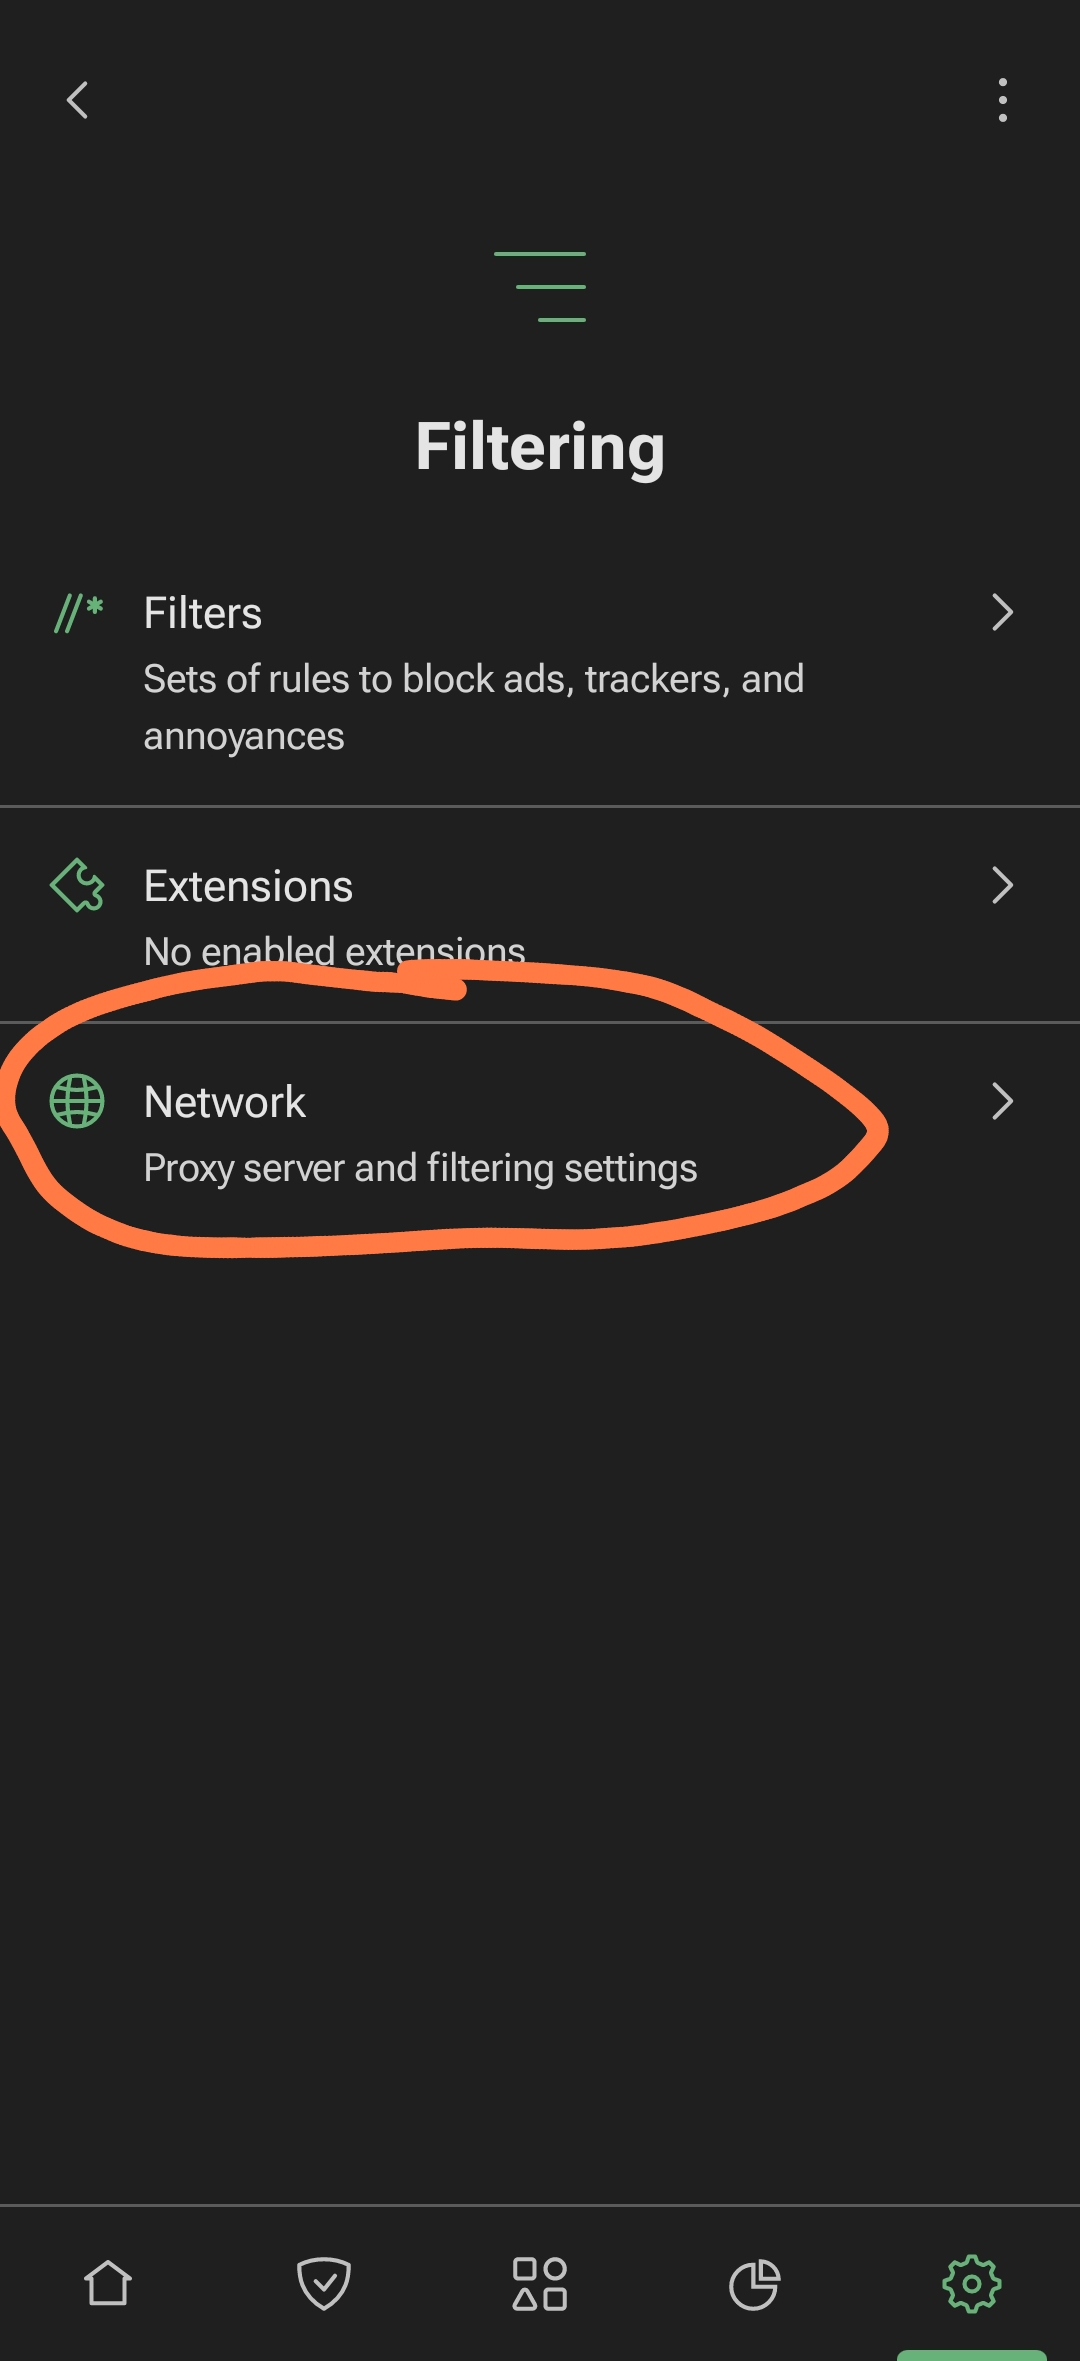
Then open Settings → Filtering → Network → Proxy, enable the proxy, and enter the same address and port configured in ByeByeDPI. Select SOCKS5 as the proxy type.
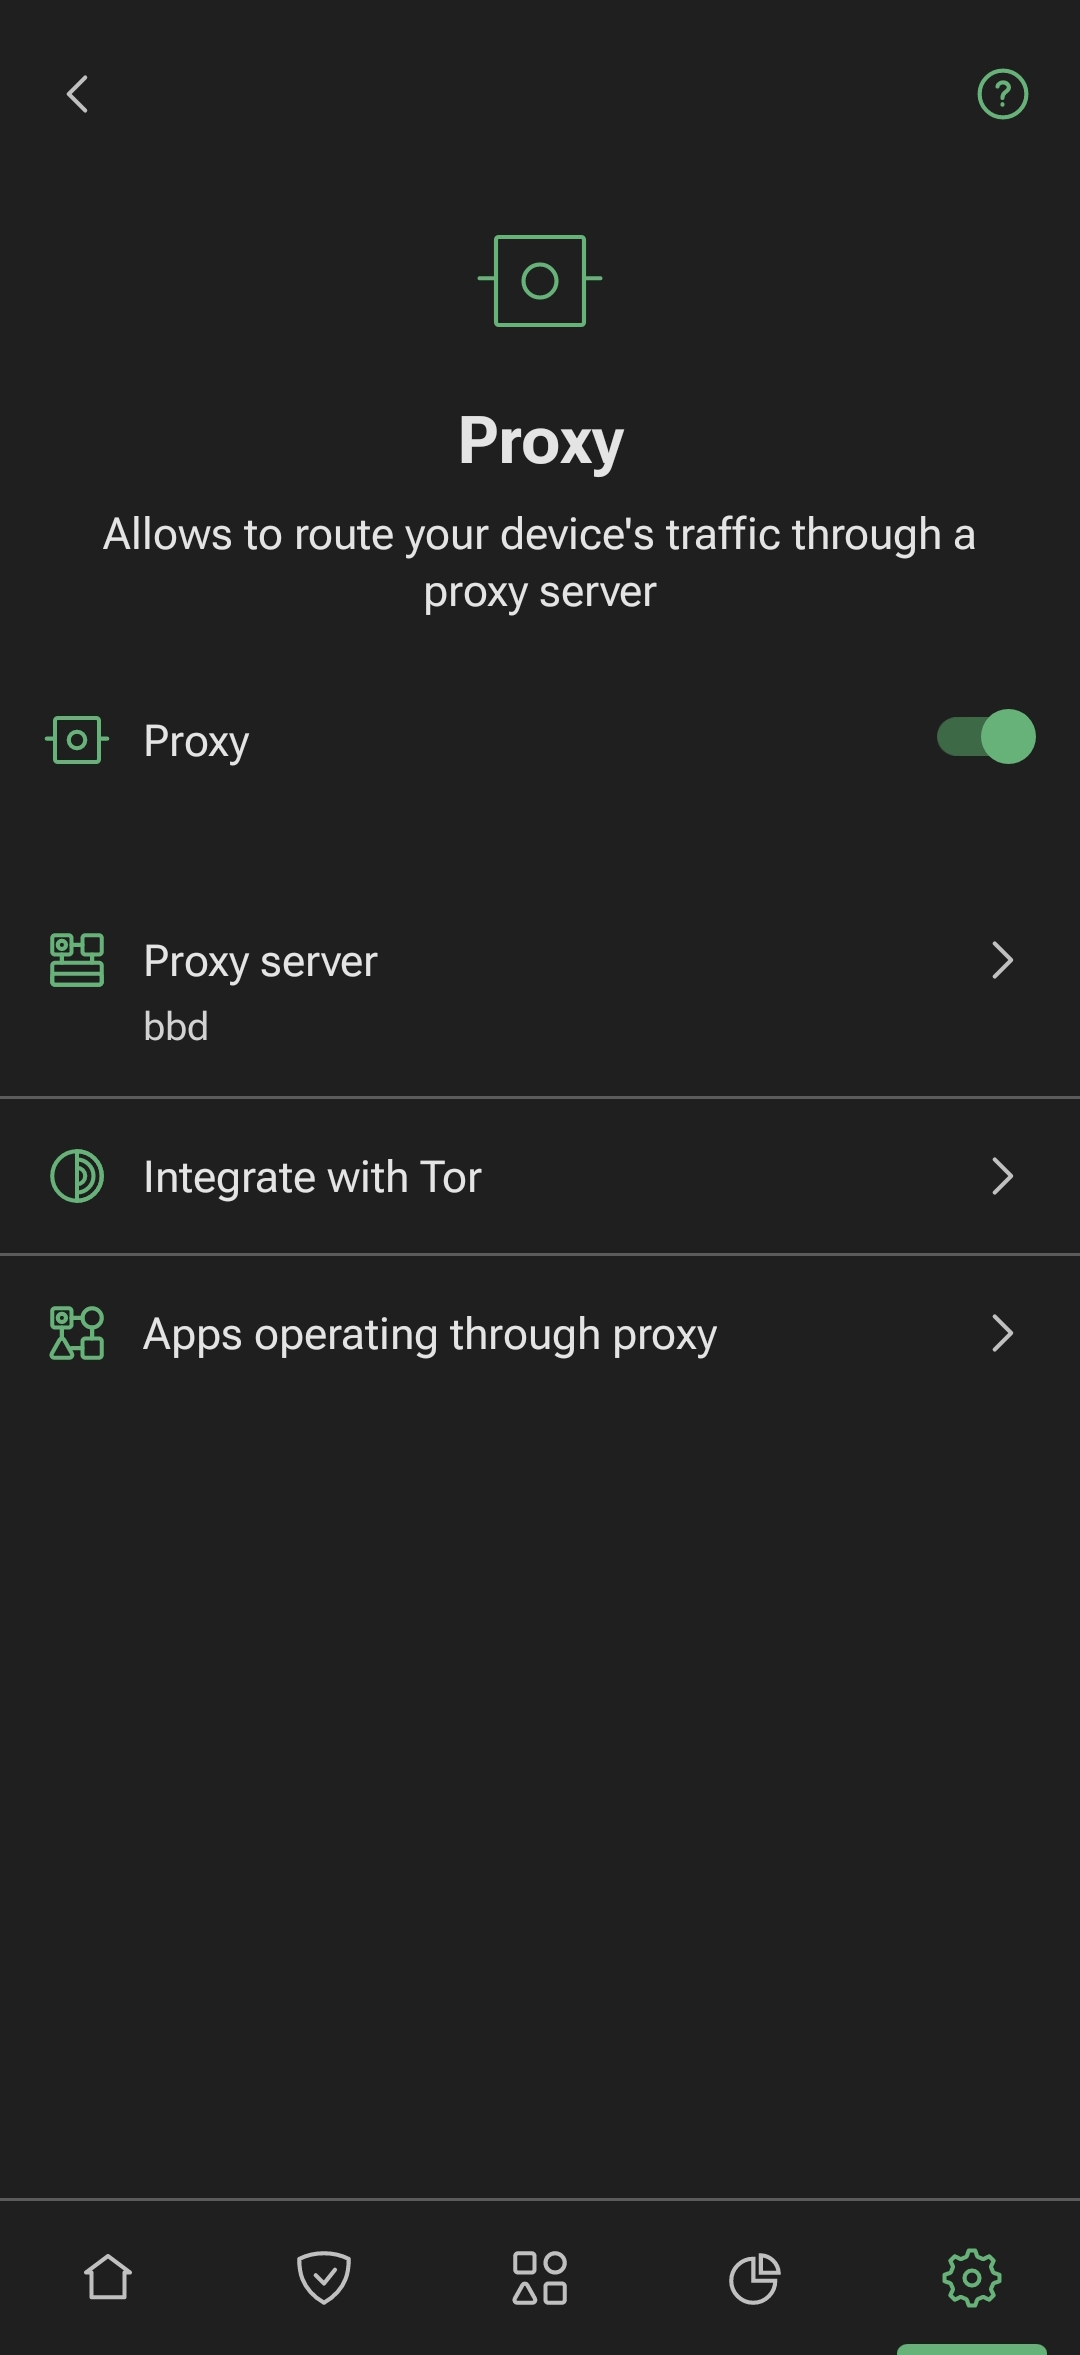
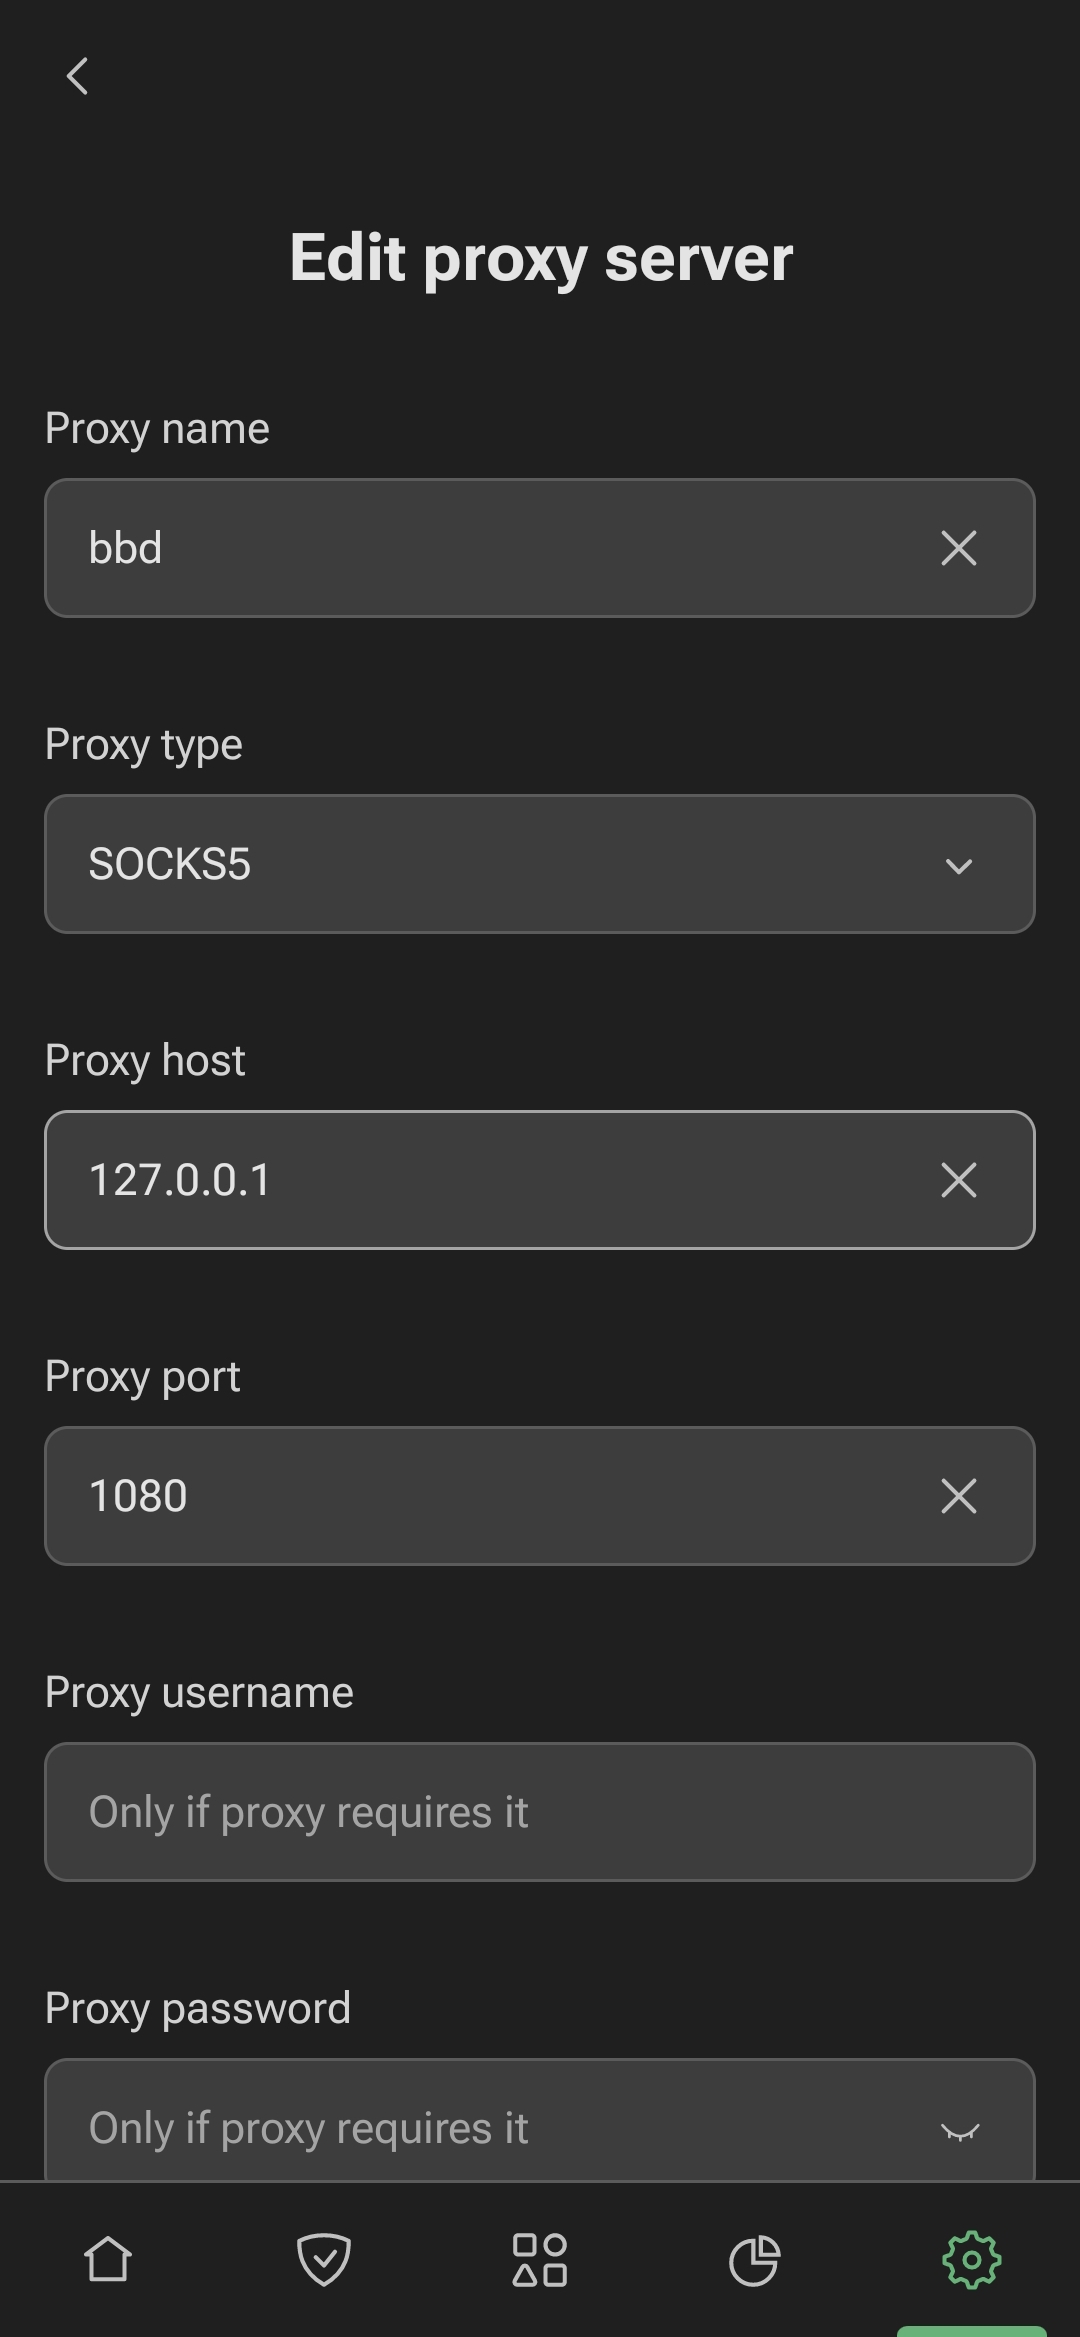
Enable proxy use in AdGuard.
Warning
If AdGuard reports “Failed to connect to proxy” during its check but applications work through it, the message can be ignored.
Important
You may need to add ByeByeDPI to the exceptions another way: AdGuard → Settings → General → Advanced → Low-level settings → Excluded applications. Add the application ID io.github.romanvht.byedpi.
IPv6 toggle
Caution
Keep this setting at its default value. Enabling it may break access to some websites or the entire connection on the device.
This toggle forces ByeByeDPI to establish connections over IPv6. Enable it only if your network and the required websites support IPv6.
Using files in strategies
Grant the application access to files: ByeByeDPI → Settings → File Access.
After permission is granted, arguments that support a file can use its path. See the ByeDPI documentation for details.
Example strategy: -f512 -t7 -l:'/storage/emulated/0/Download/g.bin'. You can find the exact path in a file manager.